Factory Farming
Introduction
Factory farming is an Automation & Logistics game available to buy and slide-load onto the Playdate from timboe.itch.io.
Starting from an empty plot of land, build up an agrochemical empire by exploiting the land for industry. Plant crops and use conveyor belts to move raw resources into factories where they can be refined into valuable products. Sell these products to unlock more crops, more factories, and grow your business.
Factory Farming is an open source project under the MIT licence.
The latest version v1.5 was released September 2023.
Beginner's Guide
This section of the guide details how to play the game, there are no spoilers until the Advanced Guide.
The main game loop in Factory Farming revolves around the assembly of ever more complicated products, and the sale of these products to fund new factories which build yet more complicated products.
Cargo is the general term used to refer to all harvested crops, extracted resources & factory products
which may exist in the world and be moved around via conveyor belts.
The World
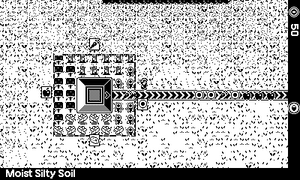
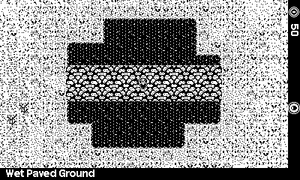
You start on a paved area of land which contains the facilities which will form the base of your operations (the shop, and the sales depot). Conveyor belts are the only buildings which you can place on this paved area.
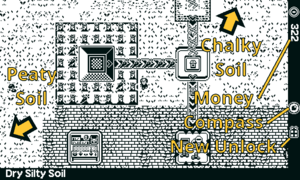
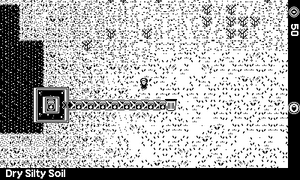
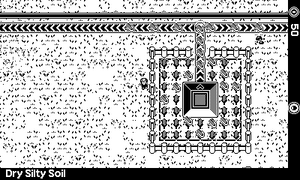
Away from here you will find large expanses of silty soil. To the north you will find a patch of chalky soil and to the west you will find a small patch of peaty soil. You may also find systems of lakes and rivers, and the occasional obstruction (such as a dead tree). Obstructions prevent a tile from being built on, and will need to be worked around.
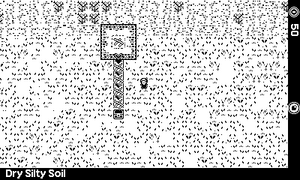
You can hold the B button while moving to run. Look to the bottom information bar as you move around the world as this will tell you
- The current soil type
- How wet the soil is (wet, moist, dry), dependent on how far away the nearest lake or river tile is.
- Any building or crop occupying the tile.
- Any cargo item which is sitting on or is in transit through the tile.
The world of Factory Farming wraps around on itself, so if you head off in any direction then sooner or later you will find yourself back where you started!
There are two zoom levels, use the Crank or hold down A and press Down on the D-pad to change the zoom level. Conveyor belt animations are optional when zoomed in, these animations can be turned off in the settings.
You can also access a map from your inventory screen.
The Shop
The shop is right next to you when you start the game, and is where you buy all of your crops, conveyors, harvesters, factories & utilities.
Access the shop by pressing A when standing near it, buy items by selecting them and pressing or holding A. Your money is always displayed down the right hand information bar, if you don't have enough money then an "X" icon will display in the corner of the shop window.
You can buy in multiplies of x1, x5, x10, x50 or x100, as indicated in the right hand information bar. Change this by rotating the crank or holding the B button and pressing Up or Down on the D-pad.
Are you lost? Don't be! When exploring the world a compass will display in the right hand information bar, follow the black point of the compass to quickly return to the shop.
The Sales Depot
The shop is where you spend money, the sales depot is where you make it.
All different types of cargo can be sold for profit, however you will find that highly refined products sell for substantially more than the raw ingredients which went in to making them.
You can sell cargo directly from your inventory by visiting the sales depot, pressing A, selecting a type of cargo which you are holding, and pressing or holding A. You can sell in multiplies of x1, x5, x10, x50 or x100, as indicated in the right hand information bar. Change this by rotating the crank or holding the B button and pressing Up or Down on the D-pad.
Manually selling cargo is fine, but it's a lot of manual work. Much better is to build a network of conveyor belts to move cargo onto one of the eight accessible tiles of the sales depo, where it will be automatically sold and your balance credited.
You will unlock new things to buy in the shop by selling certain cargo at the sales depot, you can press the menu button at any time to see what your current goal is and how close you are to achieving it. Once you have reached a goal, a present icon will display in the right hand information bar. You should visit the shop if you see this icon and find out what new things there are to buy.
The Inventory Screen
Pressing A when not next to the shop or sales depot will bring up your inventory. The top row of the inventory is used to select the from three different tools which you can use to interact with the world, these are always available.
Once you have purchased crops or buildings from the shop, these will show below and can be selected to place in the world.
Finally any cargo you have picked up is listed at the bottom of your inventory, select this to place cargo directly into the world.
Pickup Cargo Mode
In this mode you can press or hold A to pickup any cargo which is lying on the ground or on conveyor belts. If you pickup from any harvester, storage chest or factory you will transfer the entire cargo content into your inventory - for factories this includes all of the input ingredients held by the factory.
You can cycle between 1x1, 3x3 and a 5x5 pickup range using the crank or by holding B and pressing Up or Down on the D-pad.
Hold down A and press Left on the D-pad as a shortcut to enter Pickup Cargo mode.
Inspection Mode
Inspection Mode displays a more detailed version of the bottom information bar. As well as continuing to show the current soil type, wetness, crop/building and cargo on the current tile, when in inspection mode you can additionally see:
- The tile's map coordinate
- For crops: the soil type & wetness statistics, the time needed to grow each crop and the time remaining until the next crop is ready.
- For conveyor filters: the cargo type being filtered on.
- For harvesters, the cargo held in the harvester's hoppers.
- For factories, the input ingredients, the output product; and the amounts held of all of these. The amount of time the factory takes to produce a new output, and the amount of time remaining until the next output is produced.
Hold down A and press Up on the D-pad as a shortcut to enter Inspection mode.
Deconstruction Mode
Deconstruction mode lets you pack up placed crops, conveyors, harvesters, factories and utility items. These go back into your inventory to be placed elsewhere.
By default, a pickup operation is performed automatically before the deconstruction, such that you do not loose any cargo which was lying on the ground or inside any deconstructed facility. This option can be disabled in the settings. With it off, any destroyed cargo are lost.
You can cycle between 1x1, 3x3 and a 5x5 deconstruction range using the crank or by holding B and pressing Up or Down on the D-pad.
Hold down A and press Right on the D-pad as a shortcut to enter deconstruction mode.
Map Mode
View a real-time map of the current plot, you can move the cursor around to inspect each tile of the map and see cargo items moving around on conveyor belts.
Crop Planting
You can buy seeds for all of the crops you have currently unlocked in The Shop, each different Crop will specify its preferred soil type and water requirements after its name.
Plant crops by selecting the seeds from your inventory and pressing A while standing on an appropriate patch of soil.
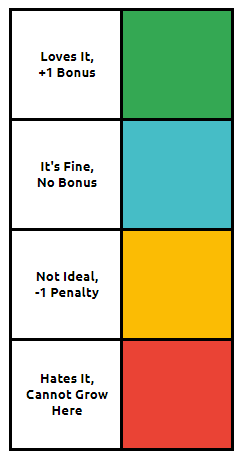
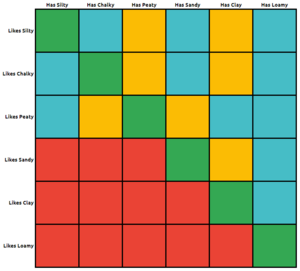
The crop will get a modifier from both the soil type and wetness, the soil modifier will be +1 if it is the soil which the crop prefers, otherwise it may be +0 or -1 depending on the soil, some plants hate certain types of soil and get a -3 modifier meaning that they can never grow in that location.
Similarly if the wetness is what the crop prefers it will get a +1 modifier, if it is adjacent (e.g. likes wet but has moist, or likes moist but has dry) then there is no bonus, and if it is opposite (e.g. likes dry but has wet) then there is a -1 penalty.
The combination of the soil and wetness modifiers is shown as a smiley face when planting the crop
- +:2 major growth bonus.
- +1: growth bonus
- 0: no bonuses
- -1: serious growth penalty
- -2: cannot grow here
Each different type of crop has a base growing time which is affected by this growth modifier, once this growing time countdown ends the produce pops up on the tile, at which point it can be harvested. Once harvested, the countdown restarts and the next growing cycle commences.
Conveyor Belts
Conveyor belts move cargo at the rate of one tile per second, there can be at most a single item of cargo on any one tile at any time.
There are three types of splitter conveyors, two different two-way splitters ("I" and "L" splitters) plus one three-way splitter ("T" splitter), each splitter will attempt to alternate through its outputs after having passed each piece of cargo, however they will not alternate around to an output if it is blocked (if the next tile already contains cargo).
There are two types of two-way filter conveyors, "I" and "L". A filter conveyor will remember the first cargo type to pass over it and will then always route all future occurrences of that type of cargo in the same direction. All other cargo types will be sent in the other direction. Use inspection mode to see which type of cargo a particular filter is filtering upon.
Overflow conveyors also come in "I" and "L" variants. These conveyor belts always try and move cargo on their primary exit direction, but if the output tile in this direction is blocked (there is another immovable cargo here) then the cargo will instead be directed to the overflow direction. These belts can help you prevent parts of your factory from backing-up, or allow you to define a priority order for delivering cargo.
Conveyor tunnels allow for cargo to move underground for precisely one tile. Placing a tunnel entrance will automatically place a corresponding exit. Note that the exit is cosmetic and acts like a regular conveyor belt piece. The tunnel exit can be replaced with any other conveyor piece or building and the tunnel will still operate.
When placing conveyor belts (or other buildings), rotate the conveyor either by turning the crank or by holding the B button and pressing the desired direction on the D-pad.
Harvesters
Crop harvesters will automatically attempt to harvest from all tiles within their radius every 4 seconds, providing that there is space inside a hopper to store the cargo. Each harvester has space in its hoppers for up to 255 of three different types of cargo. There is a single output from the harvester indicated by the arrow, cargo will be continually placed here until all three hoppers are emptied.
A box outline shows the harvest range of each harvester.
Extractors act similarly to harvesters, except that they produce an unlimited quantity of a specific cargo type, and often can only be placed in specific locations.
Factories
Your factories represent the primary way in which you will create value, the items your factories produce are worth significantly more than the raw ingredients which go in to feed them.
Each factory type is purchased individually from the shop. By selecting the factory in the shop or Inventory screen an ingredients list is shown of all of the inputs the factory needs to operate. Only the ingredients listed in bold are important for gameplay, the others are there for flavour.
Factories will consume between 1 and 5 different types of input cargo and produce a single type of output cargo. The factory can only operate while it has stored at least one of each input, and its output storage is not full (each factory can store up to 255 of each input, and 255 of its output), the amount of time required to manufacture is dependent on the number of ingredients
- 1 ingredient: 1 second
- 2-3 ingredients: 2 seconds
- 4-5 ingredients: 3 seconds
One of each of the input ingredients is consumed to make each output cargo.
When a factory is placed in the world, the inspection mode can additionally be used to see a factories' inputs and outputs, as well as the number of stored cargo and the time needed to manufacture.
Try and only feed a single cargo type into a factory on any one of the seven accessible input tiles.
Otherwise you risk clogging the factory should it fill up with a particular input cargo type.
Controls
Factory Farming includes Crank controls, but there are alternate provided to the Crank controls which just use the A, B buttons and the D-Pad. Additional short-cuts are provided for convenience. The full set on controls is listed below.
- Use the D-pad to move around the world and menus.
- Use A to:
- Enter the menu for the shop, sales depot, etc. when standing next to them.
- Enter the player's inventory.
- Select an item from the inventory, or from any other menu.
- Plant a crop, or build a conveyor, factory, extractor or utility.
- Pick up cargo (when in pickup mode)
- Destroy cargo and deconstruct buildings (when in Deconstruction mode)
- Press B to exit any menu or cancel any action.
- Hold down B and use the D-Pad to run
- Activate a quick shortcut by holding down A and then press a button on the D-pad
- Hold A and press Left for Pickup Mode
- Hold A and press Up for Inspect Mode
- Hold A and press Right for Deconstruction Mode
- Hold A and press Down to toggle Zoom.
- Hold A, and then (after a brief pause) move around with the D-pad when in pickup mode, deconstruction mode, or crop planting mode to quickly pickup many cargo / deconstruct many buildings / plant many crops.
- Zoom in or out by turning the crank.
- Turn the crank when standing on a conveyor belt to follow the conveyor.
- Turn the crank or hold B and press Up or Down when in the shop's or sales depot's menus to change the buy/sell multiplier.
- Turn the crank to quickly navigate forwards and backwards through the content of all other menu.
- Either turn the crank or hold B and press Up or Down when in pickup or deconstruction modes to change the action's range.
- Either turn the crank or hold B and press Up, Down, Left or Right when placing an conveyor, extractor, factory or utility to rotate the facility.
Other Settings
By pressing the Menu button on your Playdate and selecting Menu you can access the game settings.
- Toggle sound effects, music, change the music volume, and optionally switch off footsteps.
- Toggle the Screen Shake effect
- Toggle the in-game Tutorial
- Toggle the rendering of conveyor belt animations (only when zoomed in)
- Toggle the rendering of the boundary of harvesters (requires save & load to apply the change)
- Toggle the crank-to-follow-conveyor feature. With this switched off the crank will control the zoom even when standing on conveyor belts.
- Toggle centre camera. Controls if the camera only scrolls when the player is at the edge of the screen, or stays centred on the player.
- Toggle an automatic zoom-in when your character is moving - this can help preserve a good framerate in busy parts of the factory.
- Change the amount of time between auto-saves (or switch this off).
- Change if a pickup command is issued before each deconstruction command (in order to save any cargo)
- Toggle if conveyor belts are automatically upgraded to high-speed belts when being placed (requires conveyor grease to be in the player's inventory)
- Toggle the rendering of debug information on the game's performance and draws chunk boundaries (requires save & load to apply the change to the chunk boundaries)
- FPS: Number of frames rendered per second (target: 32)
- SL: Number of sprites being passed to the Playdate's sprite system for rendering.
- NT: The number of nearby cargo, conveyors, factories etc. (simulated 16 time per second)
- FT: The number of far away cargo, conveyors, factories etc. (simulated 2 times per second)
- B: The total number of all crops, conveyors, extractors, factories and utility items placed in this plot.
- C: The total number of cargo pieces active in the plot. i.e. all the cargo in transit on conveyor belts, or sitting on the ground (does not include any cargo which are inside buildings).
- Save and exit to title, or exit to title without saving.
- Take a screenshot of the entire plot, this will be written as a large bitmap image file into the Playdate's data folder. It will take around 3 minutes to capture & save the full screenshot on the playdate hardware.
Advanced Guide (Spoilers)
Spoiler Warning: Be aware that this section of the guide contains spoilers to the game progression of Factory Farming.
Crops (Advanced)
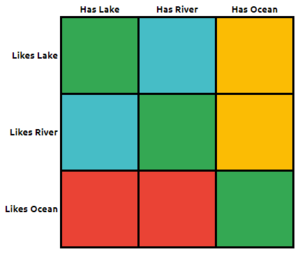
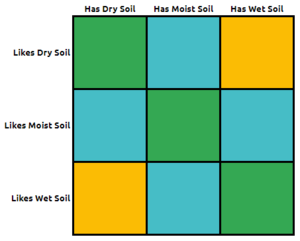
As detailed above, each planted crop will have a modifier between +2 and -2 (or lower), this can be computed using the following soil type (and water type, as some crops are aquatic) and wetness lookup tables in conjunction with the crop data below
From which it is possible to compute the growth bonus or penalty
- +2: 30% growth bonus
- +1: 10% growth bonus
- 0: no bonuses
- -1: 50% growth penalty
- -2: cannot grow here!
| Crop | Unlock Condition | Price | Base Grow Time | Likes Soil | Likes Wetness |
| Carrot Plant | Always Available | 1 | 80s | Silty | Moist |
| Sunflower Plant | Sell 5 Vitamins | 5 | 70s | Chalky | Dry |
| Potato Plant | Sell 20 Sunflowers | 50 | 90s | Peaty | Wet |
| Apple Tree | Sell 60 Ethanol | 100 | 95s | Peaty | Moist |
| Seaweed Bush | Sell 110 Hard Cider | 150 | 60s | Lake | Water |
| Corn Plant | Sell 100 Meat | 300 | 70s | Chalky | Moist |
| Wheat Plant | Sell 160 Corn Dogs | 450 | 60s | Silty | Dry |
| Cactus Plant | Sell 280 Beer | 900 | 90s | Sandy | Dry |
| Lime Tree | Sell 200 Tequila | 1,170 | 95s | Sandy | Moist |
| Strawberry Plant | Sell 170 Jello-Shots | 4,680 | 80s | Clay | Moist |
| Cocoa Plant | Sell 150 Protein Powder | 7,956 | 80s | Clay | Wet |
| Coffee Plant | Sell 240 Cakes | 12,729 | 90s | Loamy | Moist |
| Bamboo Plant | Sell 220 Perk Pills | 17,820 | 60s | Loamy | Moist |
| Sea Cucumber | Sell 330 Foo Young | 147,906 | 80s | Ocean | Water |
| Rose Bush | Sell 8 Roses | 207,068 | 80s | Loamy | Dry |
The World (Advanced)
The game begins in the grasslands, with access to silty, chalky and peaty soils, but other soil types are needed to progress beyond planting wheat.
The plots, exports and imports depots unlock along side cactus seeds, allowing the factory to expand further.
The Plots Depot
You can purchase new plots of land from the plots depot, and move between the plots you already own. There are eight plots in total, and not all of them are purchased with money - some need to be purchased with specific cargo.
Only one plot of land may be loaded into the Playdate's memory & simulated at any time, however you will still earn earn money from cargo sales from all of your un-loaded plots as well as the loaded one. The amount paid is averaged from when each plot was last loaded.
The Grasslands
Price: Free
The starting plot, the grasslands is mostly silty soil, with some chalky and a little peaty soil. It contains an average number of lakes and rivers. The grasslands can grow crops up to wheat.
The Stony Plateau
Price: 35,922
The stony plateau is mostly chalky soil, with some peaty and a little sandy soil. It contains an small number of lakes and rivers. The stony plateau can grow crops up to lime trees.
The Boggy Hollow
Price: 123,104
The boggy hollow is mostly peaty soil, with some sandy and a little clay soil. It contains a very large number of rivers, but no lakes. The boggy hollow hollow can grow crops up to cocoa plants.
The Desert
Price: 725,248
The desert is mostly sandy soil, with some clay and a little loamy soil. The land is parched, it contains no natural water sources. The desert can grow crops up to bamboo.
The Estuary
Price: 1,137,180
The estuary is mostly clay soil, with some Loamy and a little silty soil. It contains an average number of lakes and rivers.
The Fertile Hills
Price: 2,114,012
The fertile hills are mostly loamy soil, with some silty and a little chalky soil. They contain an above average number of lakes and rivers. All crops can grow OK in the large expanses of fertile loamy soil.
The Tidal Mud Flats
Price: 200 Party Packs
The tidal mud flats are mostly ocean, river, and clay soil. A number of tributaries feed the ocean.
This is the only plot containing ocean tiles. The ocean surrounding the mud flats can be used to farm sea cucumbers.
The Tranquil Plains
Price: 400 Miracle Powders
The tranquil plains are an endless expanse of pure loamy soil, there may be a single lake too. There is no obstructed ground, just lush loamy soil in all directions.
The retirement cottage can only be built in the tranquil plains.
The Exports Depot
The exports depot acts a bit like the sales depot, however instead of selling cargo for profit, it lets you export the cargo such that it may be imported and further utilised in another plot.
The rate at which different cargo types are input to the exports depot are averaged over the previous 60-120s. By looking at the exports depo's menu interface you can see which types of cargo are being exported over all of your plots, and the rate at which each is being exported by the current plot, and by all plots together.
Note: In any given plot, you cannot export any cargo which is also being imported into that same plot.
The Imports Depot
Once you start to export cargo, you'll want to be importing it too.
Each plot can have up to four different imports, one each on the North, East, South and West facing sides of the imports depot. It is possible to import a single type of cargo to more than one of these directions, should you need a very large import rate (and have a large enough export rate from other plots to support this!).
By opening the menu at the imports depot you can see all available exported cargo types, and the number of importers of that cargo type (which is added up over all of your plots). If a cargo type is being imported either North, East, South or West then it will be highlighted this screen and will be contributing to the number of importers.
For each active import, you will receive the total export rate of the cargo type from all other plots, divided by the total number of importers of the cargo type over this and all other plots.
The import process happens every 10 seconds, and imported cargo can be placed on all twelve tiles next to the imports depot. The depot has internal storage of up to 256 items for each of the four different import slots.
Harvesters (Advanced)
Two crop harvesters and four extractors are unlockable.
| Harvester | Unlock Condition | Price |
| Automatic Harvester (7x7) | Sell 10 Carrots | 50 |
| Automatic Harvester (9x9) | Sell 220 Jello-Shots | 23,082 |
| Harvester | Unlock Condition | Price | Output |
| Chalk Quarry | Sell 10 Carrots | 75 | Chalk |
| Salt Mine | Sell 40 Vegetable Oil | 656 | Salt |
| Water Pump | Sell 80 Potato Chips | 1,698 | Water |
| CO2 Extractor | Sell 290 Cakes | 108,786 | CO2 |
Factories (Advanced)
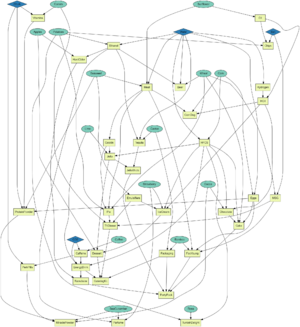
The game's progression is summarised in the following graph & table.
| Factory | Unlock Condition | Price | Output | Time | Input #1 | Input #2 | Input #3 | Input #4 | Input #5 |
| Vitamin Factory | Sell 10 Carrots | 100 | Vitamins | 2 | Carrots | Chalk | - | - | - |
| Vegetable Oil Factory | Sell 30 Potatoes | 250 | Vegetable Oil | 1 | Sunflowers | - | - | - | - |
| Potato Chip Factory | Sell 80 Vegetable Oil | 875 | Potato Chips | 2 | Potatoes | Vegetable Oil | Salt | - | - |
| Ethanol Factory | Sell 110 Potato Chips | 2,625 | Ethanol | 2 | Potatoes | Water | - | - | - |
| Hard Cider Factory | Sell 70 Apples | 3,412 | Hard Cider | 2 | Ethanol | Apples | - | - | - |
| Abattoir | Sell 90 Seaweed | 6,824 | Meat | 2 | Sunflowers | Seaweed | Water | - | - |
| Hydrogen Factory | Sell 150 Meat | 5,118 | Hydrogen | 1 | Water | - | - | - | - |
| Hydrogenated Oil Factory | Sell 200 Meat | 6,141 | H. Oil | 2 | Oil | Hydrogen | - | - | - |
| Corn Dog Factory | Sell 250 Meat | 7,983 | Corn Dogs | 2 | H. Oil | Meat | Corn | - | - |
| Beer Factory | Sell 120 Wheat | 11,974 | Beer | 2 | Ethanol | Water | Wheat | - | - |
| Tequila Factory | Sell 140 Cacti | 15,566 | Tequila | 2 | Ethanol | Cactus | Water | - | - |
| High Fructose Corn Syrup Factory | Sell 250 Tequila | 14,009 | H.F.C.S. | 2 | Corn | Water | - | - | - |
| Gelatin Factory | Sell 300 Tequila | 18,211 | Gelatin | 1 | Meat | - | - | - | - |
| Jello Factory | Sell 350 Tequila | 23,674 | Jello | 2 | Gelatin | H.F.C.S. | Lime | - | - |
| Jello-Shots Factory | Sell 160 Jello | 30,776 | Jello-Shots | 2 | Jello | Tequila | - | - | - |
| Emulsifiers Factory | Sell 50 Strawberries | 21,543 | Emulsifiers | 1 | Seaweed | - | - | - | - |
| Ice Cream Factory | Sell 80 Strawberries | 32,314 | Ice Cream | 3 | H.F.C.S. | Strawberries | Emulsifiers | H. Oil | - |
| Battery Farm | Sell 100 Ice Cream | 35,545 | Eggs | 2 | Corn | Water | - | - | - |
| Protein Powder Factory | Sell 180 Ice Cream | 46,208 | Protein Powder | 3 | Eggs | Seaweed | Vitamins | Chalk | - |
| Chocolate Factory | Sell 200 Protein Powder | 60,070 | Chocolate | 2 | Cocoa | H.F.C.S. | H. Oil | - | - |
| Meat Pie Factory | Sell 175 Chocolates | 84,098 | Meat Pies | 3 | Meat | Gelatin | Wheat | Potatoes | - |
| Monosodium Glutamate Factory | Sell 270 Meat Pies | 92,507 | M.S.G. | 2 | Wheat | Salt | - | - | - |
| TV-Dinner Factory | Sell 320 Meat Pies | 129,509 | TV-Dinners | 3 | Meat Pie | Carrots | Emulsifiers | M.S.G. | - |
| Chocolate Cake Factory | Sell 230 TV-Dinners | 181,312 | Cake | 3 | Wheat | Eggs | Chocolate | H.F.C.S. | - |
| Caffeine Powder Factory | Sell 340 Cakes | 145,049 | Caffeine | 2 | Coffee Beans | CO2 | - | - | - |
| Energy Drink Factory | Sell 390 Cakes | 203,068 | Energy Drinks | 3 | Limes | H.F.C.S. | Caffeine | CO2 | - |
| Rave Juice Factory | Sell 250 Energy Drinks | 284,295 | Rave Juice | 2 | Hard Cider | Energy Drinks | - | - | - |
| Perk Pills Factory | Sell 310 Rave Juice | 369,583 | Perk Pills | 2 | Caffeine | Chalk | - | - | - |
| Packaging Manufacturer | Sell 270 Perk Pills | 406,541 | Packaging | 2 | Bamboo | Cactus | - | - | - |
| Dessert Factory | Sell 370 Perk Pills | 528,503 | Desserts | 2 | Jello | Ice Cream | Apples | - | - |
| Catering Pack Factory | Sell 420 Perk Pills | 687,053 | Catering Packs | 3 | TV-Dinners | Desserts | Energy Drinks | Packaging | - |
| Foo Young Meal Factory | Sell 280 Catering Kits | 755,758 | Foo Young | 3 | Meat | Eggs | Bamboo | M.S.G. | - |
| Party Pack Factory | Sell 290 Foo Young | 906,909 | Party Packs | 3 | Foo Young | Jello Shots | Cakes | Rave Juice | Packaging |
| Parfume Factory | Sell 30 Sea Cucumbers | 1,088,290 | Parfumes | 2 | Sea Cucumber | Strawberry | Ethanol | - | - |
| Miracle Powder Factory | Sell 250 Parfume | 1,305,948 | Miracle Powders | 3 | Sea Cucumber | Protein Powder | Perk Pills | Cocoa | - |
| Turkish Delight Factory | Sell 100 Roses | 1,567,137 | Turkish Delight | 2 | Roses | H.F.C.S. | Potatoes | - | - |
Utilities
As you progress through Factory Farming you will unlock various utility items to help you manage your factory.
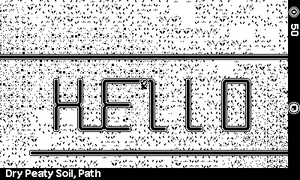
Path
Price: 131, Unlock Condition: Sell 50 Crisps
As well as providing a good way to block out different parts of your factory, you receive a 30% boost to player acceleration when walking or running along a path.
Sign
Price: 2,394, Unlock Condition: Sell 110 Corn Dogs
The sign helps you to label and organise your factory complex. Place a sign on a tile, and then place any cargo on the sign in order to display it on the sign (this does not consume the cargo).
Trash Bin
Price: 3,891, Unlock Condition: Sell 130 Beers
If you have any cargo which you need to get rid of, and it is too complicated or not worthwhile setting up the logistics to sell it, then bin it! Any cargo which is transported onto a trash bin will be destroyed.
Well
Price: 5,603, Unlock Condition: Sell 150 Tequilas
The Well is a user-placeable water source. Placing it will dampen all tiles in an 8-tile radius, use the well to create better growing conditions for your crops in areas without natural water sources.
Removing the well will return the soil to its prior levels of wetness.
Storage Box
Price: 6,462, Unlock Condition: Sell 110 Strawberries
Like a harvester's hoppers, each storage box can store up to 255 of three different types of cargo. Fill the storage box by placing items on the box, either manually or via conveyors.
By using the inspection mode, you can see what cargo is stored in the box. The storage box can only be emptied by hand, use the pickup mode to collect its content.
Buffer Box
Price: 12,925, Unlock Condition: Sell 140 Strawberries
The buffer box is similar to the storage box, with the one key difference that it is self-emptying (like a harvester).
Pay attention to the arrow on the box, as the buffer box will attempt to place any cargo it holds onto the next tile in this direction.
Factory Upgrade Module
Price: 64,628, Unlock Condition: Sell 60 Ice Creams
When built immediately North, South, East or West of a factory, the Factory Upgrade Module will decrease the production time of the factory.
One Factory Upgrade module can influence multiple factories, though any one factory will only obtain a bonus from the first three upgrade modules built besides it.
The production bonus obtained is:
- 1 module: production time reduced by 0.5 seconds
- 2 modules: production time reduced by 0.75 seconds
- 3 (or more) modules: production time reduced by 1.0 seconds
No factory can have its production time reduced below 0.5 seconds by upgrade modules.
Conveyor Grease
Price: 710, Unlock Condition: Sell 140 Ice Creams
Conveyor grease can be used to upgrade all conveyor belt types to Mark-II conveyors which are twice as fast as Mark-I (moving cargo at two tiles a second, rather than one).
The grease can either be applied manually, in a 1x1, 3x3 or 5x5 area around the player. Or it can optionally be applied automatically to all newly placed conveyor belts. Go to the settings menu to enable the automatic application of conveyor grease.
Obstruction Remover
Price: 37,002, Unlock Condition: Sell 220 Meat Pies
No longer do your complex factory designs need to be spoiled by a piece of obstructed ground in an unfortunate place. Each obstruction remover can be used to clear exactly one piece of obstructed ground, leaving useable soil in its place.
Landfill
Price: 36,958, Unlock Condition: Sell 260 Rave Juice
Landfill can be placed on soil or water, though its primary use is to fill in bodies of natural water. This can be done either to create artificial land which conveyors, harvesters, etc. can be built upon. Or, to dry out the surrounding area.
The only way to dry out a patch of soil which is wet due to its proximity to a natural body of water is to use landfill.
Landfilled tiles can be built upon, but they cannot be planted with crops.
An important consideration is that once placed, landfill is permanent and can never again be removed. Use with care!
Rotavator
Price: 147,833, Unlock Condition: Sell 270 Perk Pills
The rotavator converts the eight tiles surrounding it into loamy soil, allowing for a wider variety of crops to be planted in its vicinity.
If removed, the same eight tiles will revert to their previous soil type.
Retirement Cottage
Price: 9,794,610, Unlock Condition: Sell 300 Parfume
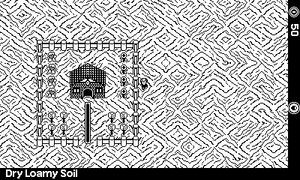
A cosy cottage, a long quiet retirement with all of your amassed riches from your dubious business practices. The retirement cottage is frightfully expensive, and it can only be built in the tranquil plains.
Building the retirement cottage unlocks the end-game credits.
Fence
Price: 65,297, Unlock Condition: Sell 50 Roses
As first seen surrounding your retirement cottage, the fence is a decorative item which can be used to section off different parts of your factory.
Fences cannot be walked or run over. Fence pieces are placed not on the player's current tile but rather on the next tile. Use the crank or hold B and press a direction on the D-pad to specify in which direction the fence pieces should be built.
Example Save Game
Click here to download a mega-factory built as part of the game's development and testing.
Cheats
Maybe you want a more sandbox experience, or maybe you just want to mess around? By going into the menu, selecting Rotate under the in-game controls help section, and pressing A twenty times you will unlock infinite money. Similarly, pressing A twenty times on Resize will unlock all crops, conveyors, harvesters, factories & utilities. Press A another twenty times here to re-lock everything.
